Roles and permissions
Moveo.AI uses Role-Based Access Control (RBAC), a model that grants access through roles instead of one permission at a time. You assign one or more roles to a member, and each role bundles the permissions for a specific job function. A member can hold several roles at once. Their effective access is the union of every role assigned directly to them and every role assigned to the teams they belong to.
Manage members, roles, and teams from the Manage access page in the account settings. The page has three tabs: Members, Teams, and Roles.
Permission groups
Moveo groups permissions by product area. Every role sets one access level per group, and the level applies to everything the group covers.
| Access level | What the member can do |
|---|---|
| No access | The area is hidden. The member cannot open it at all. |
| Read only | The member can open and view, but cannot change anything. |
| Can reply | The member can read conversations and send messages in them. |
| Can edit | The member can view, create, edit, and delete. |
Can reply applies to the Chat group only. Every other group offers No access, Read only, and Can edit.
The table below lists the twelve groups and what each one covers.
| Group | What it covers | Levels |
|---|---|---|
| AI Agents | AI Agents and their versions | No access, Read only, Can edit |
| Knowledge | Knowledge bases and their documents | No access, Read only, Can edit |
| Campaigns | Campaigns and broadcasts | No access, Read only, Can edit |
| Contacts | Contacts and contact field definitions | No access, Read only, Can edit |
| Analytics | Dashboards, saved filters, and reports | No access, Read only, Can edit |
| Connections | Integrations with external channels and systems | No access, Read only, Can edit |
| Rules | Routing rules | No access, Read only, Can edit |
| Dev tools | API keys, language models, and event notifications | No access, Read only, Can edit |
| Environments | Environments, departments, business hours, and context bundles | No access, Read only, Can edit |
| Chat | Conversations and quick responses | No access, Read only, Can reply |
| Settings | Roles and teams | No access, Read only, Can edit |
| Billing | Invoices, payment methods, and subscription details | No access, Read only, Can edit |
Extra permissions
Some groups carry extra permissions as separate checkboxes. The checkboxes in the table below appear only after you raise the group to Can edit, or to Can reply for the Chat group. At No access and Read only none of them is shown.
The Chat group carries one more checkbox, Show AI agent conversations, which is the exception. It belongs to the Access conversations scope and not to this table. See Access scopes.
| Group | Extra permission | What it grants |
|---|---|---|
| AI Agents | View chat logs | Viewing AI Agent conversations |
| Analytics | Edit reports | Creating and editing custom reports in Analytics |
| Dev tools | Edit API keys | Generating and editing API keys |
| Dev tools | Edit LLMs | Editing pre-trained language models |
| Dev tools | Edit event notifications | Editing event notifications |
| Chat | Edit quick responses | Editing quick responses for human agents |
| Settings | View activity history | Viewing the activity of other members |
| Settings | Invite members | Inviting new members to the account |
| Settings | Manage roles | Creating, editing, and assigning roles – only the owner can grant it |
Access scopes
Two groups narrow their access further with a scope. A scope limits which records the level applies to.
Access environments sits on the Environments group. Choose All to cover every environment in the account, or Selected to pick specific environments. If you choose Selected, you must pick at least one environment before you can save the role.
Access conversations sits on the Chat group and has three options:
- All: every conversation in the account.
- Only assigned to them: conversations assigned to the member personally.
- Only assigned to their department: conversations that belong to the departments of the member.
The Chat group also carries a Show AI agent conversations checkbox. Select it to also show conversations the AI Agent is handling, before a person takes them over.
Both scopes appear at Read only as well, which is one step lower than the extra permissions need. The Show AI agent conversations checkbox follows the scope, so it appears from Read only upward too.
The account owner
The owner is the person who created the account. Ownership is a property of the account, not one of the roles. The owner therefore does not appear in the Roles tab, and you cannot assign ownership from the role picker. Each account has exactly one owner, set at account creation and changed only through an explicit ownership transfer.
The owner holds unrestricted access. The owner is also the only member who can transfer ownership, delete the account, grant Billing access, or grant the Manage roles permission.
An owner can transfer ownership of the account to another member by clicking the Transfer ownership option on the Manage access page.
System roles
The Roles tab lists five system roles that cover the common job functions. You cannot edit the permissions of a system role. To change anything, create a custom role instead.
Admin
Trusted operator who runs the workspace day-to-day, configuring integrations, writing routing rules, inviting members, and managing roles and teams. Admins have full operational access. They cannot access billing, and they cannot take the owner-only actions.
Chat Manager
Support team lead or operations manager who runs the live-chat operation. Chat Managers do everything a Chat Agent does, and they also configure the queues, departments, business hours, and environments that shape how conversations are routed.
Builder
Conversation designer or prompt engineer focused on the AI side of the platform. Builders create, test, and publish AI Agents and the knowledge bases that power them. They do not take part in the live-chat operation or account administration.
Chat Agent
Front-line human agent who replies to customers. Chat Agents pick up conversations and use the productivity tools set up by the Chat Manager, such as notes, quick responses, and views. They cannot change how the operation is configured.
Billing
Finance team member or accountant who needs invoice access without seeing conversations or AI Agents. The Billing role is limited to billing information, which covers invoices, payment methods, and subscription details. Only the account owner can assign it.
View the permissions of a role
To see the exact access level of every group for a role, open the Roles tab and click the role. A View permissions panel opens with one row per permission group.
Custom roles
If no system role matches the job function you need, create a custom role. A custom role uses the same permission groups, extra permissions, and scopes described above, and you choose every value yourself.
Create a custom role
- Go to Account → Manage access and open the Roles tab.
- Click Create.
- Enter a name for the role and click Continue. The permission editor opens.
- Lower every group the role must not reach. Each group starts at its highest level.
- Clear the extra permissions the role must not have. Each checkbox starts selected, and the checkboxes show under the groups you left at Can edit, or at Can reply for Chat. Lowering a group below that level drops its extra permissions for you.
- Narrow the Access environments and Access conversations scopes. Both start at All.
- Click Save.
A new role starts with full access to everything except the two owner-only permissions. If you save the role without changing anything, every member who holds it can edit every product area. Set each group down to the level the job needs before you save.
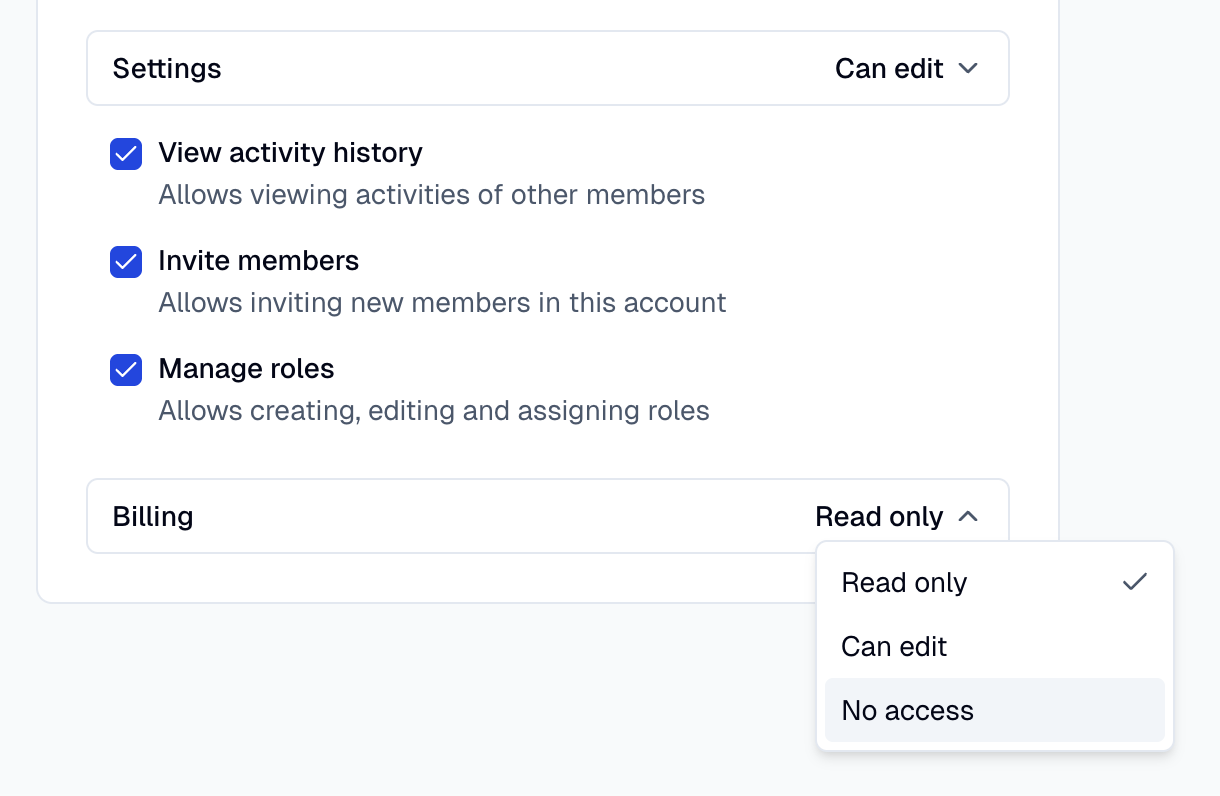
The demo above shows the editor as a member who is not the account owner. Billing is locked at No access, and the Manage roles checkbox is absent from the Settings group.
An account owner sees both. Manage roles joins the other two checkboxes under Settings, and the Billing level opens like any other group.
Duplicate an existing role
Duplicating copies every permission of the source role into a new custom role, which is faster than building a role from scratch. Only a custom role can be duplicated, because a system role card carries no actions menu. To start from a system role, open its View permissions panel and copy the levels into a new custom role by hand.
- Open the Roles tab.
- Click the actions menu on the custom role and select Duplicate.
- Keep or change the suggested name, then click Continue.
- Adjust the permissions and click Save.
Rename or delete a custom role
Open the Roles tab, click the actions menu on the custom role, and select Rename or Delete. A system role has no actions menu, so it offers neither option.
Rules to know
Owner-only permissions
Two permissions are reserved for the account owner, and Moveo treats them differently in the editor.
The Billing group stays visible to everyone. If you are not the owner, its level is locked and a tooltip explains why.
The Manage roles checkbox in the Settings group is hidden instead. Only the account owner sees it.
Duplicating drops owner-only permissions
If you are not the owner, Moveo creates the new role without them. A note on the editor lists what it left out. Ask the account owner to grant those permissions afterwards.
A role in use cannot be deleted
If the role is still assigned to a member or to a team, Moveo blocks the delete and shows an error. Remove the role from every member and team first. Then delete it.
Access adds up
The effective access of a member is the union of two sets: the roles assigned directly to them, and the roles assigned to every team they belong to. Moveo always applies the most permissive level the member holds for a group.
Teams
Teams group members so you can assign roles to several people at once. Create a team from the Teams tab on the Manage access page. You can add or remove members, edit team details, or delete the team entirely.
A member picks up every role assigned to every team they belong to, on top of the roles assigned to them directly. See Access adds up.
For example, take a member with a Chat Manager individual role. The member also belongs to a team granted the Builder and Chat Agent roles. That member holds the combined permissions of all three roles.
You can edit the access of a member or a team from the Manage access page, in the respective tab.
Invitations
Invite new users to your account from the Manage access page. Either select roles for the new member manually, or add them to a specific team. See Invite new members for the step-by-step flow and for how invitees accept the invitation.
Activity history
View all the latest changes in your account in the Activity history menu. This menu displays detailed records of all changes users have made in AI Agents and environments.
To let a member open it, grant the View activity history extra permission in the Settings group.