Rules
Rules let you automate actions in conversations, such as assigning the conversation to a specific AI Agent, tagging a conversation, and much more.
Rules help you automate your workflows for optimum efficiency and ensure your customers get the best experience possible.
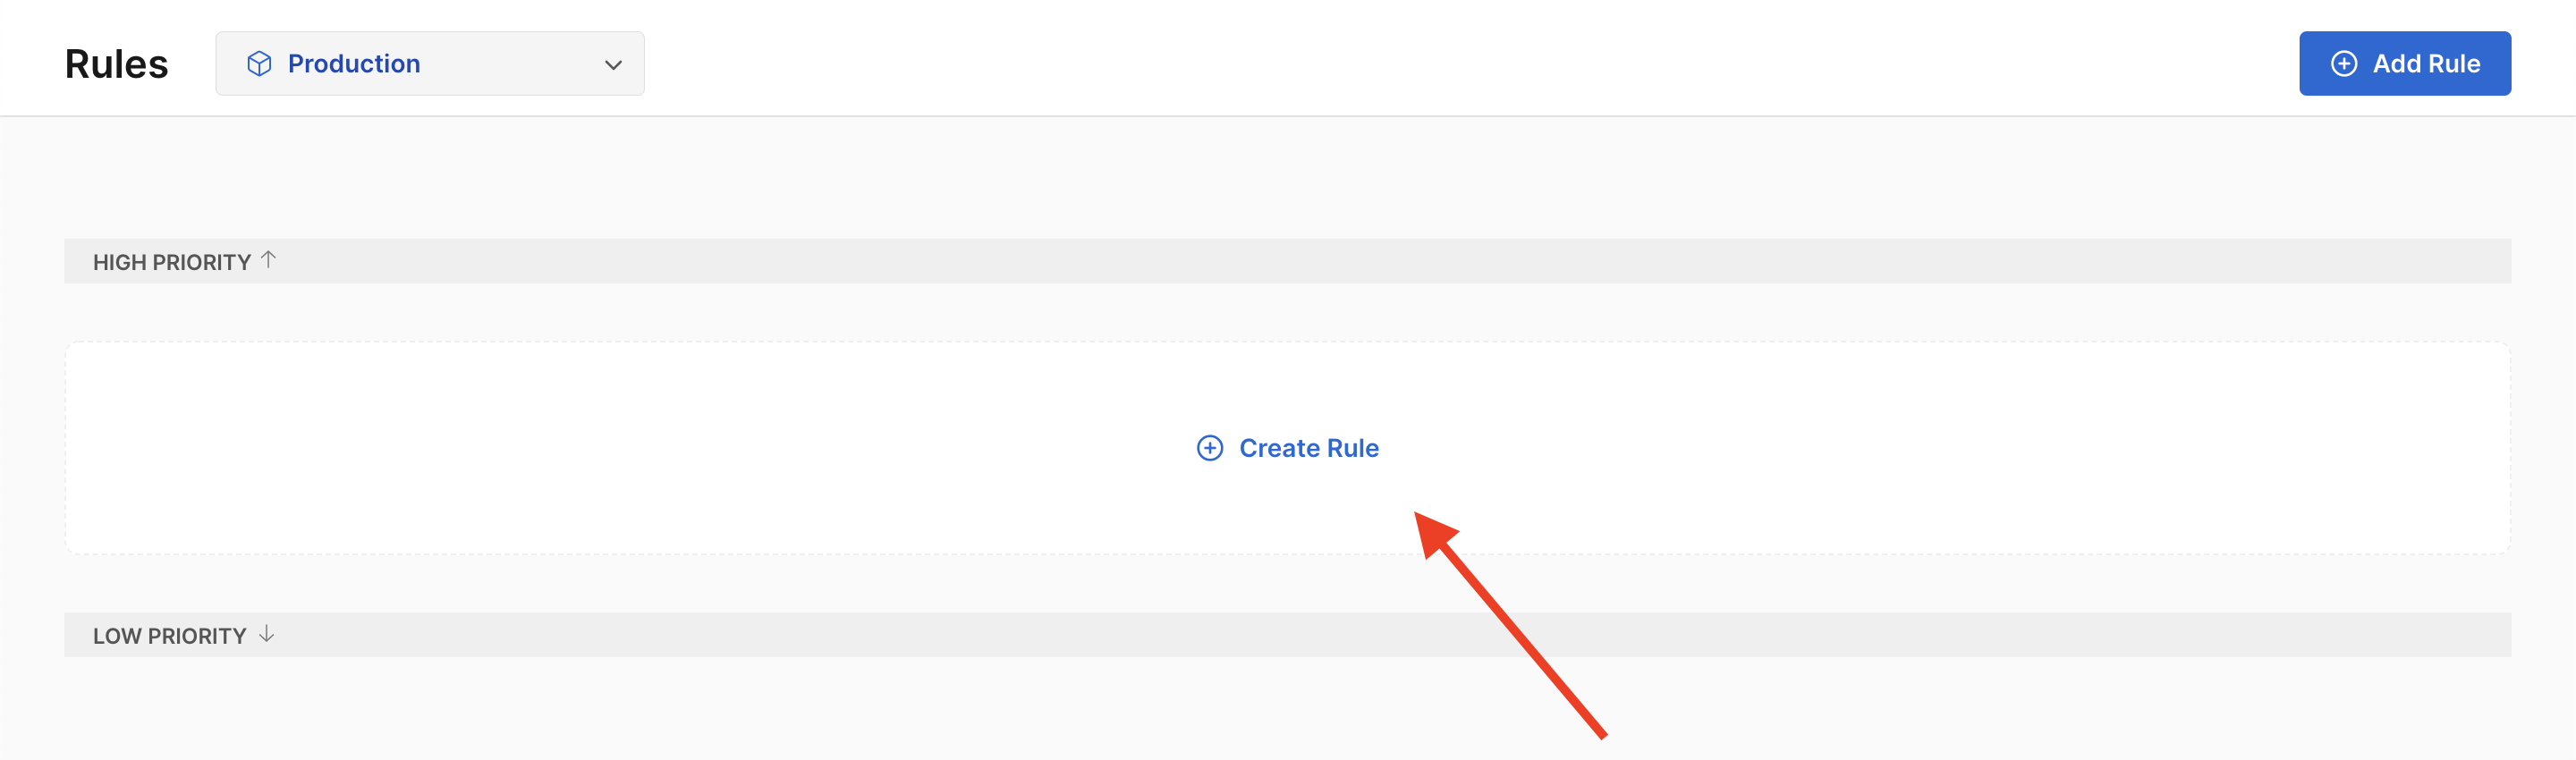
An environment can have one or more rules. The following steps demonstrate rule creation:
- Navigation
- Creation
- Rules screen

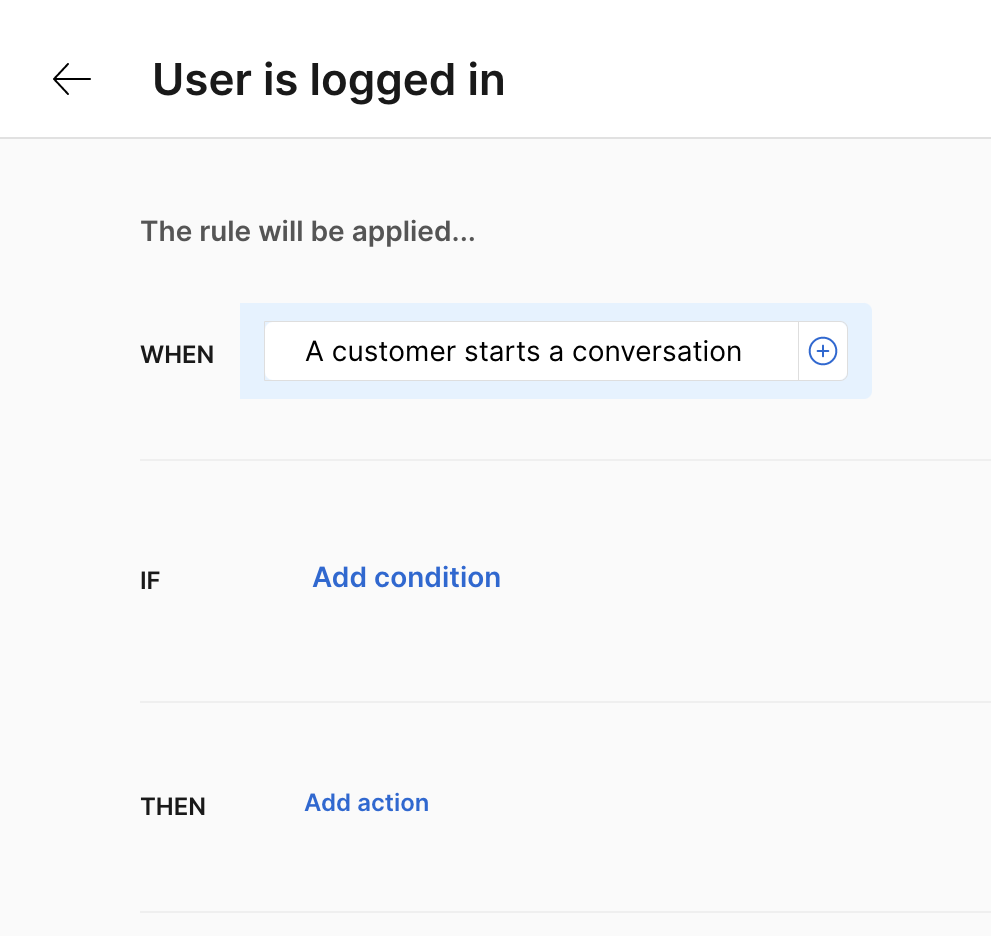
Customize your rule
Create the trigger
In the When field, set a trigger that determines when the rule executes. Options
include:
- A customer starts a conversation
- A customer responds to a message
Apply the condition
A condition is optional. If no condition is set, it evaluates as true and triggers the action. Available conditions include:
-
Availability
- Business hours
-
User
- Name
- Phone
- Language
- Timezone
- Country
- City
- Browser
- Platform
-
Conversation
- Channel
- Message content
- Tags
- Customer/referral URL
- Agent assigned
- Integration
Combine the above conditions with and/or statements.
Then
Finally, select the actions to be applied if the above conditions are met, such as assigning an AI Agent to answer the message, tagging the conversation, etc.
List of actions:
- Add tag
- Assign AI Agent
- Assign knowledge base
- Close conversation
- Apply bundle
- Assign department
Don't forget to make your rule active so it starts working.
See our guides for examples of assigning different AI Agents based on tags and language.
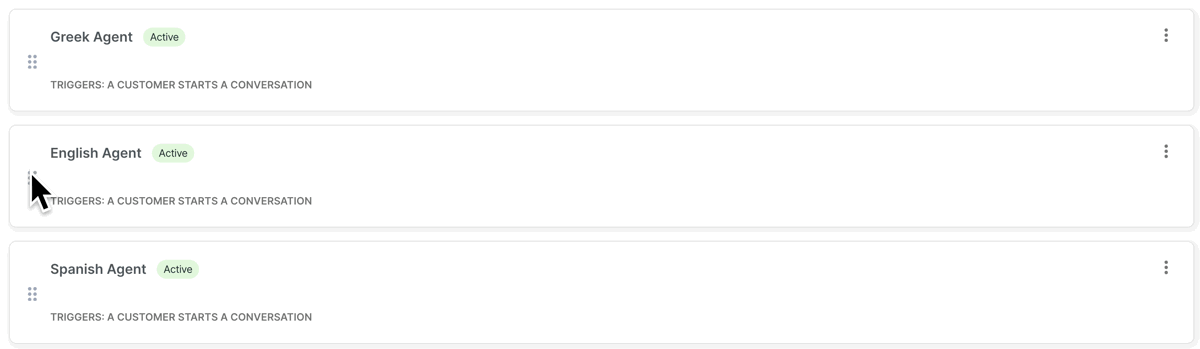
Reorder your rules
Reorder rules based on priority. Drag a rule from the icon on the very left of the tile and drop it in your desired spot.
Ensure that the highest-priority rule is at the top, and the lowest priority is at the bottom. In the following image, the English Rule has the highest priority, so the assistant checks it first. Then, the Greek Rule is reordered to have a higher priority than the Spanish Rule.